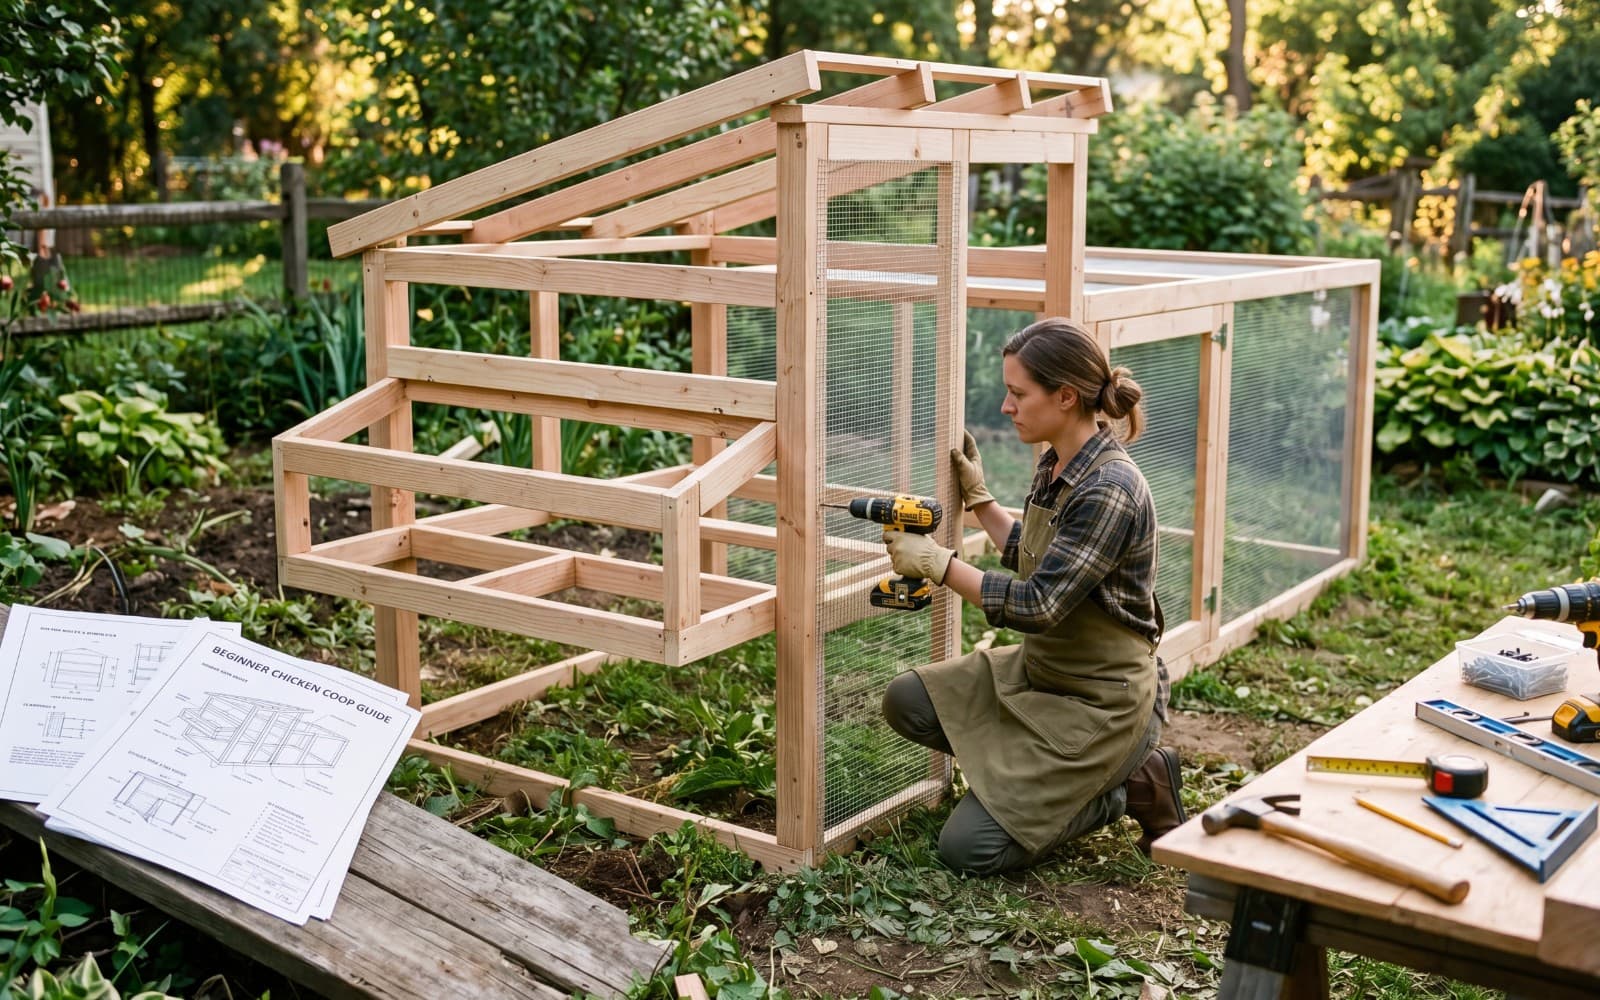
For first-time chicken keepers, building a coop can feel like a daunting task. Using beginner-friendly coop plans is the best way to ensure your project is successful, stays within budget, and includes all the features your birds need. A good beginner plan uses standard lumber sizes, minimal specialized cuts, and basic tools. This guide covers what every beginner coop plan must include, calculations for sizing, roost layouts, and how to select easy-to-use materials.
A simple, well-thought-out plan reduces construction stress and ensures you don't overlook critical elements like ventilation and cleaning access. Let's explore the step-by-step requirements that will help you construct a sturdy, secure coop for your first flock.
What every beginner plan needs
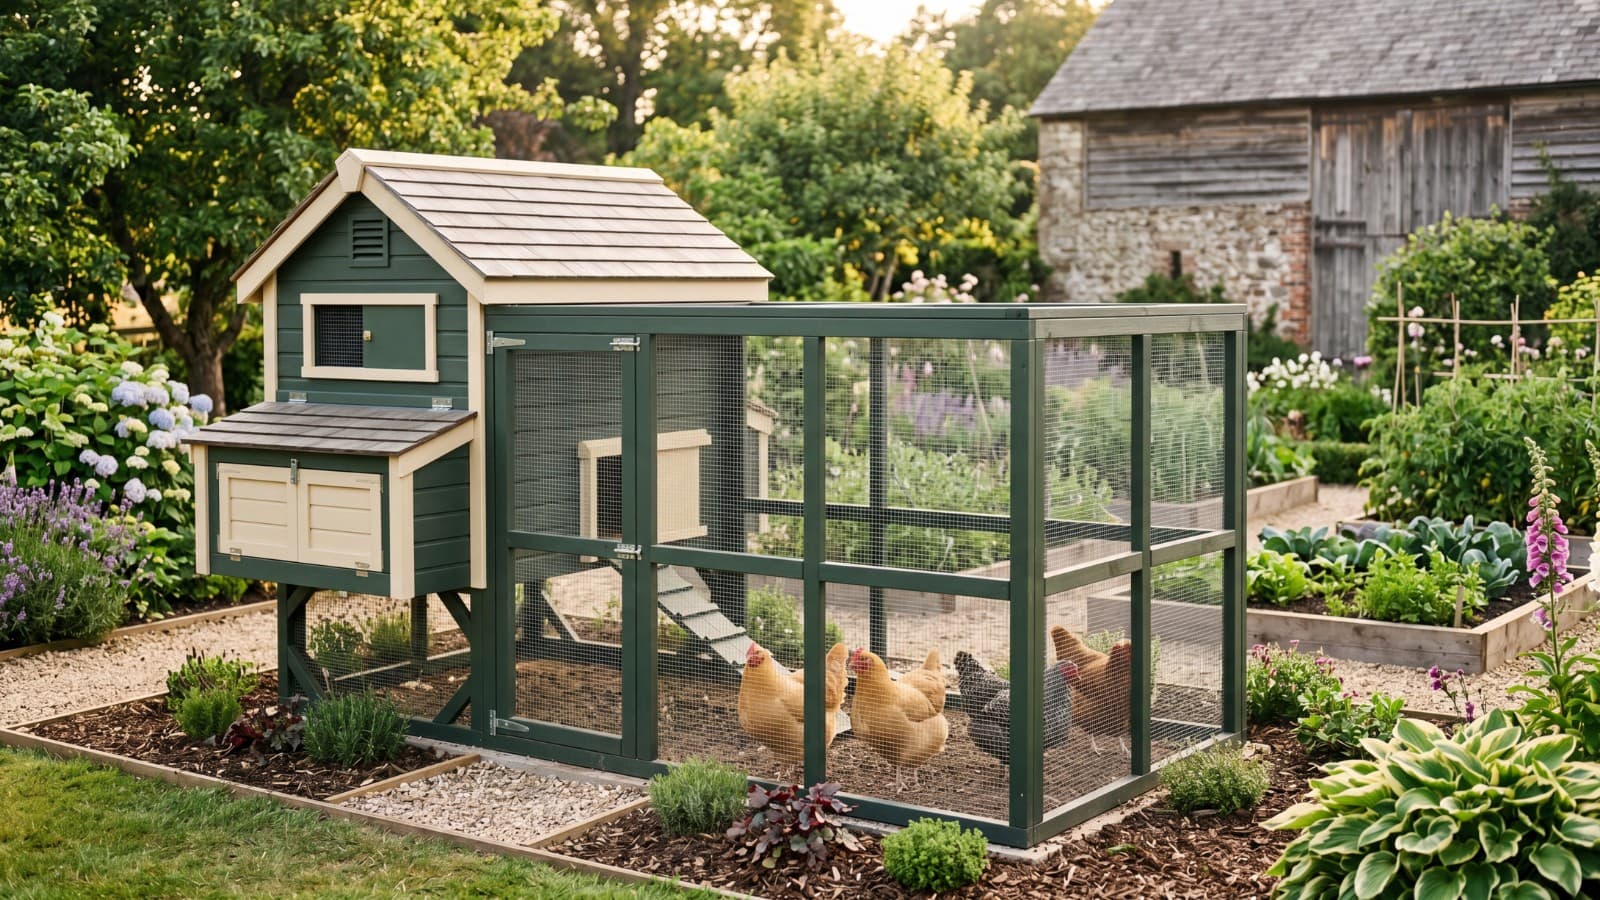
A beginner coop plan must be simple, direct, and structurally sound. It should feature a detailed cut list that minimizes wood waste, a complete list of hardware screws and latches, and clear assembly diagrams. Avoid complex angles and curved roofs; instead, opt for a simple shed roof design, which is easy to frame and highly effective at shedding rainwater.
Shed roofs require only a single slope, which simplifies rafter construction. The plan should also utilize standard 2x4 framing studs spaced at 16 or 24 inches on center, matching standard building practices that make sheathing panel installation fast and clean.
Sizing the coop
Sizing is the foundation of coop design. Plan for at least 3 to 4 square feet of interior coop space per standard hen, and 10 square feet of run space. For a starter flock of 4 to 6 chickens, a 4x6 foot coop (24 square feet) is the ideal size. This provides plenty of space for the birds while remaining easy to build using standard 8-foot 2x4 framing studs.
If you are keeping smaller bantam breeds, you can adjust this to 2 square feet of interior space per bird. Under-sizing a coop leads to stress and pecking habits, so it is always best to build as large as your yard and budget allow. A spacious coop is a healthy coop.
Ventilation done right
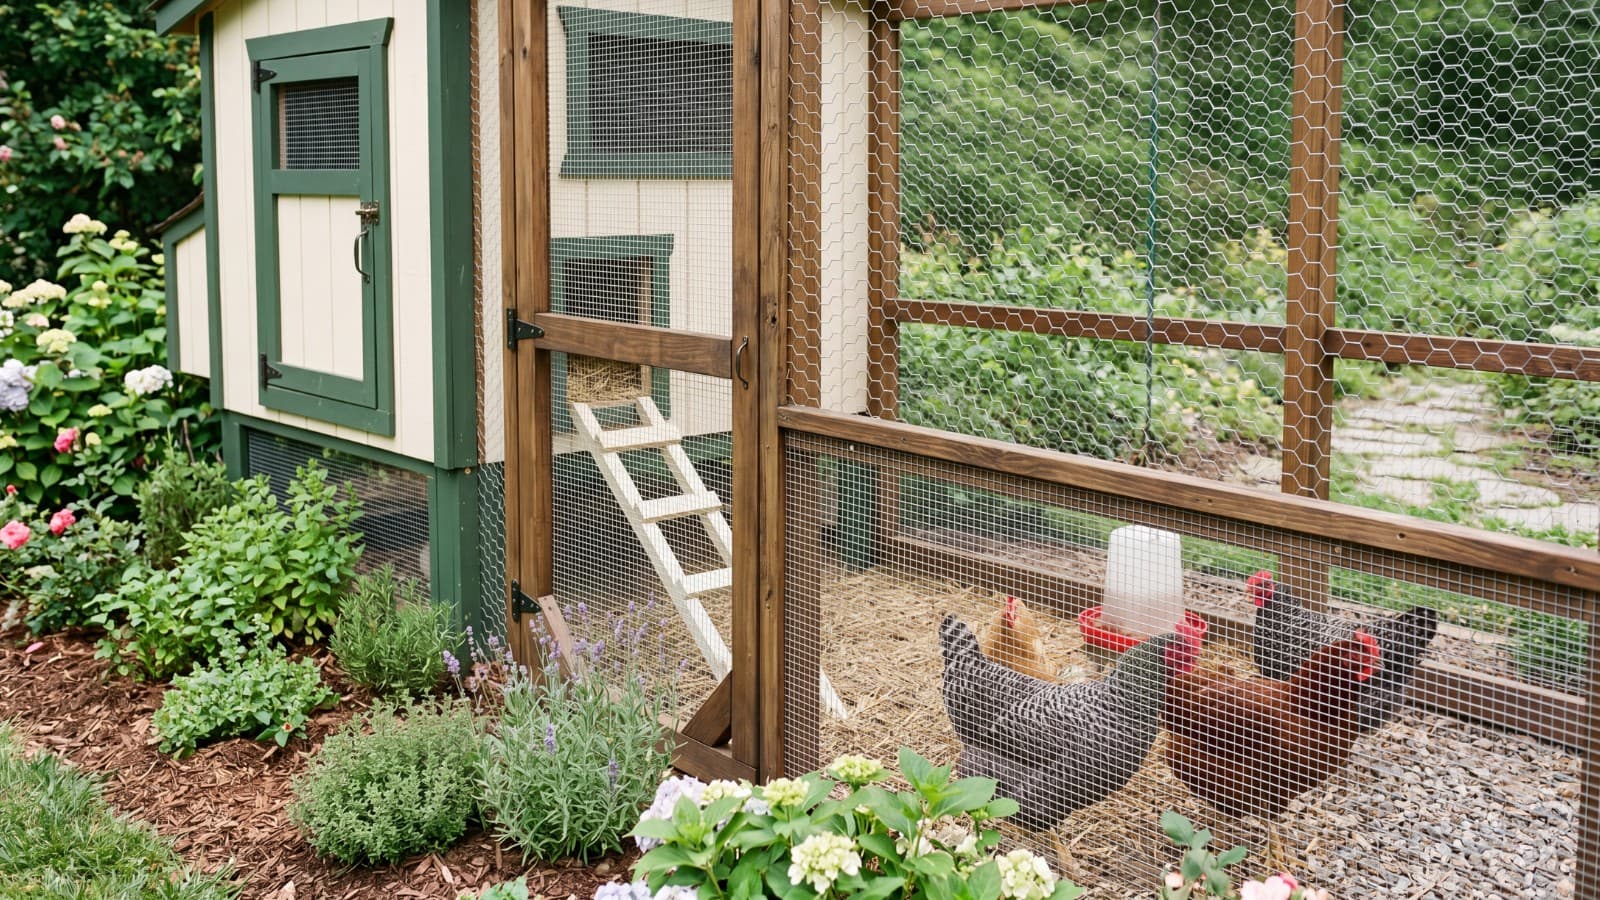
Do not seal your coop up completely. Ventilation is critical for releasing ammonia and moisture. A beginner plan should include open vents along the highest wall, covered on the inside with 1/2-inch hardware cloth. The vents must be protected by wide roof overhangs to prevent rain from blowing inside, allowing continuous airflow without creating drafts at roost level.
Moisture buildup inside a sealed coop causes respiratory illness and leads to winter frostbite on combs. Proper plans position vents high above the level of the roosting bars, ensuring warm, damp air rises and exits naturally while keeping the sleeping birds insulated from drafts.
Predator-proofing
Your plan must prioritize security. Never use flimsy screen wire or latch systems that can be opened by raccoons. The plan should specify heavy-duty slide bolts with locking carabiners on all doors. All windows and ventilation openings must be secured with 1/2-inch galvanized hardware cloth, stapled and screwed directly into the wooden wall framing studs.
To prevent digging predators from tunneling under the run walls, include a wire mesh apron that extends 12 inches outward from the base of the frame, pinned to the ground and covered with soil. Raccoons can reach through large chicken wire openings, making 1/2-inch hardware cloth essential.
Roosts and nest boxes
Position roosting bars higher than the nesting boxes to prevent hens from sleeping and pooping in the nests. Standard roosts should be made of 2x4 lumber with the wide side facing up and the edges rounded, allowing hens to cover their toes to prevent frostbite. Provide one 12x12 inch nest box for every three to four hens, filled with dry straw.
Nesting boxes should be mounted 12 to 18 inches off the floor, in a quiet, dark corner. Sloping the top of the nest boxes at a 45-degree angle prevents chickens from roosting on top of the nesting unit, keeping the entire area cleaner and reducing egg collection chores.
Access doors for cleaning
A coop that is hard to clean will quickly become neglected. A good plan includes a large walk-in door or a full-width clean-out hatch on the side of the coop. This allows you to sweep old bedding straight into a wheelbarrow. Exterior access doors for collecting eggs from the nest boxes are also highly recommended, saving you from entering the coop daily.
Egg collection doors should have rubber weather stripping to prevent drafts and rainwater from entering. Designing the pop door (chicken entrance) with a simple pulley system allows you to open and close it from outside the run, keeping you clean and dry.
Run space
The run must be attached securely to the coop and covered to protect the birds from hawks and wet weather. Use sturdy 2x4 framing to support the run wire, and wrap the bottom 2 feet in 1/2-inch hardware cloth to prevent raccoons from reaching through the wire. Burlap or solid wood panels can be attached to the windward side to provide winter windbreaks.
Covering the run ground with coarse sand or wood chips prevents mud and controls odor. A covered run also ensures the birds can exercise outdoors even during heavy snowstorms or rainy seasons, which is vital for preventing coop boredom and behavioral issues.
Materials worth paying for
Stick to standard, easy-to-find materials for your first build. Use pressure-treated lumber for the bottom skids and posts, but standard SPF (spruce-pine-fir) 2x4s for the walls and rafters. For walls, exterior-grade siding plywood (T1-11) is the easiest to install because it serves as both sheathing and siding. For roofing, lightweight corrugated asphalt panels (like Ondura) are simple to cut.
T1-11 siding panels feature vertical grooves that look highly professional and require only a simple coat of exterior paint to seal. Using galvanized deck screws rather than nails ensures the structure remains tight and resists pulling loose over years of temperature changes.
A simple starter plan structure
- Floor: 4x6 feet raised platform, framed with treated 2x4s and topped with 5/8-inch plywood.
- Walls: 6-foot tall front wall sloping down to 5-foot back wall, covered in T1-11 siding.
- Roost: A single 6-foot long 2x4 roosting bar placed 18 inches off the floor.
- Nest Boxes: A two-hole wooden nesting unit mounted on the side wall, 12 inches off the floor.
Where to find good plans
Look for plans from reputable homesteading blogs, agricultural extension offices, or dedicated coop designers who offer customer support. Avoid free plans on social media that lack complete cut lists, as they often contain structural errors. A high-quality plan costs a few dollars but saves you time and wasted lumber during the build.
Reputable plans include 3D diagrams and assembly videos that guide you through complex steps like framing doors and windows. They are written specifically for backyard keepers, ensuring that all dimensions align with the actual physical needs of adult chickens.
Frequently Asked Questions
Quick, practical answers to common questions about feeding this to chickens.
About the Author

Amy Schmelter is a lifelong chicken keeper raising a large flock in Florida and the author of the upcoming book What I Wish I Knew Before Getting Chickens. She started Chicken Homestead to share what actually works.
Disclosure
Some links on Chicken Homestead may be affiliate links. We only recommend products we’d use ourselves. See our affiliate disclosure for details.